
How to Set Up Synology NAS Step by Step in 2025?
Setting up a Synology NAS (Network Attached Storage) for the first time may seem intimidating, but with the right guidance, the process can be straightforward and rewarding. Whether you’re a home user looking to centralize your files or a business needing robust data storage, Synology NAS provides a scalable solution. In this guide, we’ll walk you through the entire setup process step by step, making it easy even for beginners. For a deeper understanding of Synology NAS features and benefits, check out our Ultimate Guide to Synology NAS.
Here is the comparison of Synology RS2821RP+ and Synology RS422+
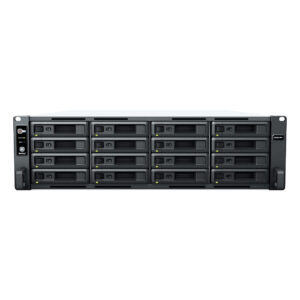
Synology Rack Station RS2821RP+
- Drive Bays: 12-bay (expandable)
- Processor: AMD Ryzen V1500B (quad-core)
- Max RAM: 32 GB
- Target Use: Enterprise, virtualization
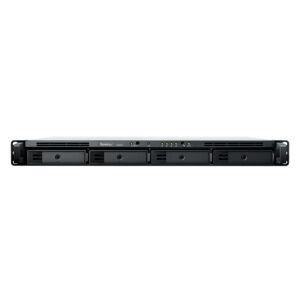
Synology Rack Station RS422+
- Drive Bays: 4-bay
- Processor: AMD Ryzen R1600 (dual-core)
- Max RAM: 10GB
- Target Use: Small businesses, file sharing
Here are the steps for Synology NAS Setup:
Step 1: Unbox Your Synology NAS
Begin by unboxing your Synology NAS and the hard drives you’ll use. Synology offers a range of models to suit various needs. For instance, the Synology RackStation RS2821RP+, Synology RackStation RS422+, and Synology RackStation RS3621XS+ are excellent choices for businesses and advanced users.
- Ensure all components, such as power adapters, screws, and cables, are included.
- Verify the compatibility of your hard drives with the Synology model by visiting Synology’s official compatibility list.
Step 2: Install Hard Drives
- Open the drive bays of your Synology NAS.
- Insert the hard drives into the bays securely, following the alignment guides.
- Push the drive trays back into the NAS and ensure they click into place.
For models like the Synology RackStation RS2821RP+, ensure the drives are installed in the correct RAID configuration for redundancy and performance.
Step 3: Connect the NAS to Your Network
- Use the included Ethernet cable to connect the Synology NAS to your router or switch.
- Plug in the power adapter and switch on the device.
- Wait for the status light to indicate the NAS is ready (steady green or blue light).
Step 4: Access Synology DiskStation Manager (DSM)
- Open a web browser on a computer connected to the same network as your NAS.
- Type
find.synology.cominto the address bar and press Enter. - The Synology Assistant tool will detect your NAS. Click on it to start the setup wizard.
Step 5: Install DSM
- Follow the on-screen prompts to install the latest version of DiskStation Manager (DSM).
- Create an administrator account and password.
- Configure basic settings like the device name and network configuration.
Step 6: Create Storage Volumes
- Navigate to the Storage Manager in DSM.
- Select “Create” to set up a new storage pool.
- Choose a RAID type that suits your needs:
- RAID 1 for redundancy.
- RAID 5 for a balance of performance and fault tolerance.
- Confirm the setup and wait for the system to initialize the drives.
Step 7: Create Shared Folders
- Go to “Control Panel” and select “Shared Folder.”
- Click “Create” to set up a new folder.
- Assign permissions based on user roles and needs.
Step 8: Set Up User Accounts
- In the Control Panel, navigate to “User & Group.”
- Create individual user accounts for family members, employees, or collaborators.
- Assign specific access permissions to each user.
Step 9: Enable Remote Access
- Open the “QuickConnect” feature in DSM.
- Create a QuickConnect ID for easy remote access.
- Optionally, configure Dynamic DNS (DDNS) for a custom domain name.
Step 10: Install Applications
- Open the Package Center in DSM.
- Browse and install applications such as:
- Hyper Backup for data backups.
- Video Station for multimedia streaming.
- Active Backup for Business for enterprise-level backup solutions.
- Configure the apps based on your requirements.
Step 11: Schedule Backups
- Use Synology’s backup applications to schedule automatic backups for your devices.
- Back up critical data to an external drive, another Synology NAS, or a cloud platform.
Step 12: Test Your Setup
- Transfer a test file to your NAS to ensure the shared folders are functioning correctly.
- Test remote access by logging in with your QuickConnect ID from another network.
- Check installed applications to confirm they are operating smoothly.
Conclusion
Setting up your Synology NAS doesn’t have to be complicated. By following these steps, you’ll have a powerful and secure data storage solution tailored to your needs. Whether you choose the Synology RackStation RS2821RP+, RS422+, or RS3621XS+, Synology NAS ensures scalability, reliability, and ease of use. For more insights and guidance, refer to our Ultimate Guide to Synology NAS.
Ready to enhance your data storage experience? Explore our Synology NAS products and order today before 4:00 PM for next-day delivery!